Sunday, 29 May 2011

An idea for a bit of a finishing touch!

I went looking for something called copper patina, on the instruction of a friend who has experience in stained glass, it is what she used to colour the lead in between the sections of glass. Where she used black patina, she said that it is also available in copper, and that it would be useful for me to cover up the lead solder which is gradually turning really grey and dull.

I was advised to buy it online but when I was in town I went into an art and craft supplies shop, where I asked if they had it. They directed me to something very similar which I bought!

I will probably solder on another spire to the shoe which is missing one, and at least paint over that bit of grey, hopefully masking it, and I will use the paint to cover up the soldery mess on the underside of the toe caps, where they are attached to the glass and where they are attached to the wire.


                                              See how it turns this rusty bike part all coppery!

 Just paint it on!


Oh and some little bits of shoe related research!
 Big fat shoe sculptures by a dutch artist I think!

And this is definitely dutch as I think these are the shoes of Rem D Koolhaas, but I found this in a mag called Glas Van Kanten (think that's its name?) and I think the focus is meant to be on the weird plastic body suit!

The images below are in my friend's Beth Levine book and I think these are her father Herbert's designs! Shoes without uppers, they just have sticky pads that your feet hopefully cling too!


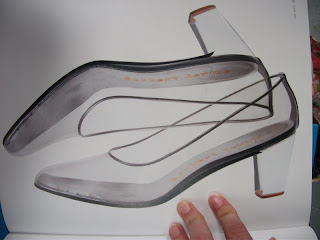
And I think these are Beth's, made of perspex!


I'm in love with the shoe world at the moment as it's so challenging to try and design something chic and statement but at the same time try to make it work, which I have not achieved! I have definitely made a statement accessory but not really a wearable one, I think that in the future I would like to make the same shoe again but maybe try to use less fragile or heavy materials. As it draws to a close, I am looking back on this project wondering a) where has all of it gone, and b) why the hell did I set myself such a task! However if I hadn't set myself that brief I would have not challenged myself at all, and never would have grown more knowledgeable in the areas of metal work and glass. My skills have grown immensely but there is still a lot of work to be done before I can sell anything that I make, so in that case I'd better wait until I go to university (September if I pass this current course) and I don't think I can wait! 


Thursday, 26 May 2011

1 day to go!

OK for starters I got the deadline a little bit wrong, tomorrow is the last day I will be allowed back in the workshop, not my official deadline... but still I can't do any practical work outside the workshops anyway!

Today was the day from hell. It started off with a big chat about painting our studios for exhibition, and plinths and shelves to display our work etc, which was not a bad strat to the day. Then I did some drawing and waited for my tutorial time. The tutorial was very positive, with both tutors telling me to just go ahead and stick all of the components together, that it would look great and to just do it! But it was the actual realisation of this that brought me to complete despair.

I started off with the attaching of the glass sole to the copper toe cap, placing copper tape on the areas that I wanted to solder the cap onto, and then doing so. This worked well but was the stupidest idea I have ever had as that meant the the attachment of everything else had to be done even more delicately and made it even more fiddly. I then went on to attach the copper wire to the top edge of the toe cap, which took ages as the inside was really smooth so all of the flux just kept burning out and the solder just dripped away. After about an hour of doing this it finally stuck. The spires were then on and all components are there but the spire looked reallywonky, wobbly and really badly made. I had remembered someone saying to use the metal rollers to get it really curvy and I tried this but it it flattened the end so much that it stretched it and it looked horrible. I cut one end off, so effectively I have ruined my own final piece... again.

Terrible photography sorry:


Wednesday, 25 May 2011

2 days left!

AAAAAAAAAAAAAAAAAAAAAAAAAAAAAAAAAAAAAAAAAAAAAAAAAAAAAAAAAAAAAAAAAHHHHHHHHHHHHHHHHHHHHHHHHHHHHHHHHHHHHHHH!!!!!!!!!!!!!!!!!!!!!!!!!!!!!!!!!!!!!!!!!!!!!!!!!!!!!!!!!!!!

I hate glass! The heels came out really badly, looking really clunky and 1990s, this morning and now I'm back to the drawing board to see what to do... there is not enough time to remake them so I think I am going with what I have already. Need to produce some new sketches of ideas to correct my issue! 


 Positively though I have completed my toe caps which look really amazing, I've left them quite rustic so they look a little bit worn, but shined the very end of the toe LOADS to really bring out the peachy, coppery tones. I'm so pleased with that and also my spires look great too, I've filed them too and polished them with the polishing mops!


Aside from the heels being HORRIBLE, I have had a lot of success with the soles, using diamond pads to file them down to a really beautiful finish. I think that they would look amazing just on their own with no heel at all. They have a lovely light aerodynamic quality to them which is also complimented by the spires, so I think I'll leave my new designs very simple. I did have a backup plan to use the necks of champagne bottles as heels as the technique for cutting them is do-able, however I will leave it as there is limited time and I'm not too keen on the colour of the bottles.


Some initial ideas to redesign the shoe.


Tuesday, 24 May 2011

3 days to go!

I'm very nervously counting down now as I am very very VERY tense! The positive aspects of this experience are that the upper of the shoe is almost done, and my sketchbook and blog are looking healthy (I think!). However there is still the matter of making the glass pieces AND fixing it all together, so the pressure is on!

I hope to get it all done by the end of Thursday so I can allow Friday for either celebrating, panicking, or amending any ridiculous mistakes, like smashing glass.

I spent this morning shaping my copper toe caps with various anvils and I think they've come out really well! I'm really happy with the shape and I've pickled them too so they're a really lovely peachy colour now. I still need to shine them up a little more as they have a lot of marks on them from the hammer, and also some dents but I can get them out using a dremel, which I will have to learn how to use... 

I didn't take any photos today because I'm stupid and forgot, whilst getting very carried away with the hammer and anvil! I will take some tomorrow of what I've done so far!

Oh and I cleaned up the copper wire spires which I forgot to mention that I completed yesterday, I'll takes some photos of them too!

4 days to go!

Only 4 days left now and luckily I was slightly ahead of where I should be, as I am very clumsy and cracked one of my soles! It came out of the kiln, I filed it nicely and then dropped it on the floor! I am stupid... observe...

 I glued it but t still looks awful so I've stuck another one in the kiln, I really hope it works! Otherwise I am doomed!

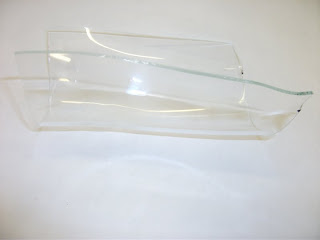
This is the mould for my heels which hasn't really worked as the glass slipped when it was in the kiln and produced the weird shape below! 


I have put them in the kiln again but just on a piece of steel that's only slightly dipped so as to ease the glass into the right shape, then tomorrow I will but the pieces onto the mould above, hopefully getting the right shape. Oh and there was two heels but I smashed one of those as well! I have made a pledge never to use a material again that I can possibly break with my own hands! :)

Friday, 20 May 2011

New heel method

My ceramic mould has come out terrible with loads of undercuts and wonky bits so I have shaped this steel instead to get a smoother heel. I have built up the curve with ceramic fibre (not shown in this photo) and covered it with kiln paper... so hopefully the glass should slump into this shape! YAY!

I am really optimistic now, and providing there are no disasters in the next week or so, I will be alright to finish all in time for the deadline! But that doesn't stop me being stressed! 

Thursday, 19 May 2011

Wednesday 18th in the workshop!

I had a really successful day yesterday both in the workshop and in my sketchbook.

I got on really well with the soldering today and I actually love the process!

Here's a picture of me having a lot of fun!


Once I got the technique right I think I was doing well, I absolutely loved every minute of it and I want to do more!


This is my last (which has come in very handy) and the crazy copper leg spire which I LOVE! The last is really helping me get just the right shapes for the upper and the sole, only having one is not too much of an issue either as I can make one shoe directly and just reverse everything over for the other shoe.
I also really like the fact that it bends as a 2D item, rather than in the shape of a leg, which makes bits wonky and really creates a great effect! 

Tuesday, 17 May 2011

Tuesday!

I went to the workshop at college for a little bit today to try some fixing methods, I only got as far as soldering as it is rather challenging! I completely forgot to take any pictures but here's some I took of the pieces taped together beforehand so I knew where to solder them.


Also I found this, a snippet of someone else's blog which is awesome! Totally relevant to my project... I love it!

Friday, 17 April 2009

Style Snippets: Balenciaga Jackets, Walking in Nina Ricci, Marc Newson for G-Star, and more...

1) Balenciaga SS09 Runway Jackets
Runway images from Style.com - click to see entire collection.

For spring/summer 2009, Nicholas Ghesquière produced an extraordinary collection for Balenciaga which, aside from being a visual adventure in sci-fi, displayed lots of innovation in cut, structure, and material. Along with the eerily beautiful, softly layered metallic dresses, the metallic, pleated, 'robot' jackets were easily the most covetable (and extreme) of the pieces shown on the runway. Brown's has just got in stock two variations of this jacket, which we've been marveling at:
They're totally extraordinary pieces (despite the structured, metallic look they are, in fact, 100% silk), and you really can't help but marvel at them, but we're not sure if we're totally converted to the rather boxy silhouette, which isn't the easiest to wear. Don't get us wrong, we're big fans of extreme fashion, and we certainly don't expect everything to be dull and wearable in the way that a cropped black trench coat is, but with a price of £3,260 (approx $4,800 - but probably a little less because of the exchange rate) you really would have to consider buying this jacket as an "investment piece" (as the magazines would say), something that you'd treasure and wear for years, yet there's something about the cut which rather throws us.

As stunning as this jacket is, with its simultaneous allusions to Art Deco glamour, 1930s visions of the future, and indeed a sci-fi vision of the future itself, and with its groundbreaking design and incredible craftsmanship, when it all boils down to actually wearing it, the cut still gets to us a bit, which is a shame really, considering how otherwise amazing it is:
What do you think? If you had the cash would you dress as a sort of humanoid version of the shiny Chrysler Building? Admittedly it isn't styled very well in the picture above, so perhaps we're being unfair - how do you think it could be worn better? Or do you find the shape problematic?
Those dresses also from that collection, though, those dresses... flawless!

Jackets available from
Browns.
 
I find it amazing how this was written 2 years ago and I'm only just realising this project thinking it was an original idea, A) I'm annoyed and B) it shows how little there must be in fashion that inspires us, for it to all be recycled!


Monday, 16 May 2011

Colchester and Ipswich museum store

I've had a lot of trouble uploading my pictures of the things I viewed in the collection but I shall reflect on my visit on my blog and put the pictures in my sketchbook... make sense?

A little while ago I visited Colchester castle and Hollytrees museum, where I viewed their collection of shoes and leather and related artefacts. When I was there I was given the cotact details of a woman who could show me round the private store to look at an extensive array of costume, including shoes!

Having visited this contact at the store, she let me photograph anything I wanted, which included dancing shoes, which she said were a lot different ot simple evening shoes, as they posessed a strap and button/buckle to allow for extra tight fit when swinging to riotous jazz music!

The shoes were all exquisitely made except for one pair which were slightly less great quality (still far better than anything we but for around the same price today in debenhams or topshop etc!). Some were made in Colchester and pretty much all of them were completely made in britain, with the exception of silks and beading probably done in the far east.

I also looked at some fantastic beaded dresses which just oozed an energetic previous life, completely tailored for dancing and for exaggerating movement. These dresses were particularly well hidden and protected, because of their value, and also because they were built for the purpose of dancing, and intended to be worn maybe 5 times in their life. This resulted in them being hung up for most of their lives, meaning that the delicate silk chiffon would tear under the weight of the heavy glass beads. Similarly, one pair of shoes, a silver painted pair of cloth shoes, had been danced into oblivion, with absolutely no care for their well being. Actually looking at them made me sad to think that their future wasn't even considered, that they would be in museums or in galleries as a nostalgic item, emulating a whole era, and defining an entire age. One pair of shoes had even been badly recovered because they had worn out so much!

Below a still from the Great Gatsby movie...


monday the 16th may!

I'm getting so excited now as I've spent all day stripping copper wire out of electrical cables (donated to me... not illegally!) and spot welding copper, and playing generally with the materials and shapes that I will use!

 Stripping wire out of a cable with a knife... resulting in a lot of near amputations of digits... a very laborious and boring task.
3 joints are spot welded, even though afterwards I was told it wasn't possible!?! and one is copper taped.

My soles came out of the kiln, and one has gone back in. As I had to individually make the kiln props out of steel, the degree of the curve on one of the props is less dramatic than the other, so I've just put the less curvy bit of glass onto the curvier bit of steel to be fired again... if this makes sense? I'm really pleased with the shape and size so I hope the heels come out ok, the moulds go in this afternoon so I'll put the glass in on wednesdaym, so friday I'll either be elated or completely depressed... I can't wait!

The pressure is on at the moment as I really can't afford to make ANY mistakes, I need everything to go to plan, or else I'll have to use the rather disgusting alternative of plastic heels, which would look OK if they weren't next to their classy cousin glass, which is far more attractive. I think it should all go well but you never know! I do however need to get some copper sheet for the toe caps because the college haven't got neough for me to use, I may need to just ask really nicely.

Aside from this, the 3DD group had a visitor today, an ex-student named Sam Lucking, a product designer, who gave us a little presentation on his career and then helped us with our workshop stuff, having some really helpful suggestions for us. His career seems amazing, and not only did he get a distinction on the foundation course (what I'm doing), he's worked on so many interesting projects and his work is very recognisable. The aspect of his work that I found most intriguing was his origami, life size crustaceans!

Friday!

I spent much of the day producing some sketchbook work of which I am very proud and I did a little work in the workshops.
I've found a new method for slumping the glass, which is using steel instead and this has come out of the kiln now! I'm very excited because the method has worked, I just need to improve the shape of the steel sheet so that there is more of an angle rather than a curve, as shown below...
I only put one in the kiln so I didn't waste too much glass, and I'm glad of this as I have now got time and materials to improve with, so I've made some more steel moulds to go in the kiln this afternoon!


Sunday, 15 May 2011

Thursday!

I have had a positive tutorial, my research and reflection is far ahead of my sketchbook work but this can be corrected as I now have some time before assessment in which to draw and paint and explore my final design ideas. Following last Friday's tutuorial, I discussed the issue of feminism with a different have illustrated this a little in my sketchbook, which has made me realise that wearing high heels is a choice that a woman makes, however, the concepts behind high end fashion are realised my men, who dictate what women wear.

Wednesdays developments...

I've been experimenting with the forming of copper in order to make an upper for my shoes...

The process of annealing is necessary first to soften the metal,

 Then use a nylon hammer to get it into the right sort of shape, on an anvil,

 Then a use a metal hammer to refine the shape... also, the shine on the hammer tip comes off onto the copper... this process is called planishing,


I used a different anvil as well to get a better shape,


This was what I acheived. I love the shape that I managed to get with just a couple of anvils, and also the shiny effect looks really great. However the whole shoe would be hard to make using this process so I have decided to use this for just the tip of the shoe, looking something like this chanel shoe
with thich copper wire to form the rest of the structure. The shape I hope to acheive will look like the spire of a building, winding once around the wearers ankle, with a few random pannels of mirror and copper lace...
Not a great image but I've alredy blogged about this so see previous!

I've also found a possible fixing method
.
.
.
.
.
.
.
.
.

I may use this copper tape to edge my soles and solder the wire onto this, I do need to practice soldering though as I'm quite new to it!

I have also found a better way of slumping my soles into the right shape and that is using steel... like so,

I've used kiln paper for the top as steel will cool at a quicker rate than glass, so the paper will stop it breaking... I hope...
This will give a much smoother finish as my ceramics skills are horrendous! I will find out a lot sooner if the steel method is effective, as opposed to stoneware which has to be fired before the glass even touches it, which will give me a lot more time to put things right if anything goes wrong. I am very optimistic!

Wednesday, 11 May 2011

Monday in the workshop...

I spent the whole of Monday building moulds for my glass soles and heels out of ceramics...

This was my attempt at cutting sole shapes out of glass... I did get some good ones... promise!


These are the heels I made out of air drying clay first to make the mould around. They look awful I know but I'm rubbish with ceramics!!!

 This is the last that I bought from the museum of London in order to get an idea of proportions and sizes of the heels and toes etc. Its proved very useful so far!
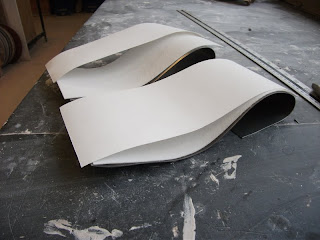
 The following are slabs which I have propped up to form the correct shape with the correct contours. This has to wait to dry, which will probably take until Friday, then it will have to be fired in the kiln first, then on Monday it can go in the kiln again to slump the glass into the right shape.


These are the moulds of the heels, where I will use the same process as above.


I added a security slab, another one just in case the others crack!

I really hope that this works as otherwise I'll have to use perspex or acrylic! yuk!